


As we’re all aware, art has been around since the beginning of time. However, something relatively new to the industry is latte art. This coffee-related art started to establish itself in Seattle in the 1980s and 1990s by a man called David Schomer. This coffee fanatic is the mastermind behind espresso coffee and the reason many of us have such great-tasting coffee. So now you know the creator of this art, what exactly is latte art?
Latte art is the method of preparing coffee by pouring foamed milk into a shot of espresso to make it look more visually pleasing. In theory, it’s “drawing” foamed milk into a picturesque design like a heart, bear, or rosetta.
Now that you understand what latte art is, I’m sure you’re eager to start developing this new skill. Because it’s such an exciting opportunity, and I adore everything to do with coffee, I’ve created this comprehensive guide that details latte art from A to Z.
If you want to enhance your latte art skills and start a new hobby, you could achieve just that after reading the below. But before you get started, your going to need some equipment.
What equipment do you need to create latte art?
Equipment is required for this hobby, just as it is for any other. Don’t get me wrong, you don’t have to purchase the equipment below. However, it will undoubtedly provide you with the best results. To gain a better understanding of the best equipment on the market for latte art, read below.
Milk frothing pitcher
As you’re now aware, the art of creating latte art requires you to pour foamed milk into a shot of espresso. Because of this, you’re going to need a milk frothing pitcher. It won’t just be able to supply an adequate container in which you can foam the milk. But it’ll also provide you an excellent pouring system, which is essential for when you want to create your designs.
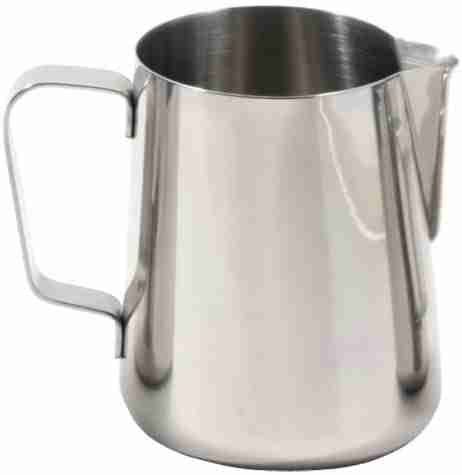
Now you understand this, it’s crucial to invest in quality. Therefore, I recommend you purchase this Rattleware 20-Ounce Latte Art Milk Frothing Picture. It’s a simple design, yet it’s something that’ll work flawlessly for your latte art.
Apart from its simple design, it’s made from 18/10 stainless steel and comes equipped with a tapered spout. Because of this, it makes it highly durable and simple to pour. Another reason why I like this is its large base. So you have more “pour area” to set up in before the milk starts flowing out.
Latte cup
Something people miscomprehend the value of in the latte art niche is the cup. The latte cup which you develop the art onto is vital. The way the coffee sits, its visual appearance, and overall durability are crucial.
Being a coffee enthusiast for countless years, I’ve tried and tested 100’s of different latte cups from home use to coffee shops. Because of this extensive usage, I’ve had some great and not-so-great cups. To save yourself the hassle, I recommend that you opt-in for one of the below cups.
Now depending on how pedantic you want to be, there are three main cups within the industry, transparent, white, and black. So here are the best cups within the industry based on these three colorways:
Choosing your latte cup depends on an array of different fundamentals. But first, make sure it’s something you’ll enjoy. For example, if you owned a coffee shop that develops latte art for their customers, I’d understand if you brought all three. However, picking one color that suits the rest of your equipment is also acceptable as a home barista.
Latte art tool
Experts tend to use an “art pen,” commonly known as a stitch barista tool Within the latte art industry. It would be hard to develop an excellent or terrible version of this tool. Therefore, opting in for anyone is generally okay.
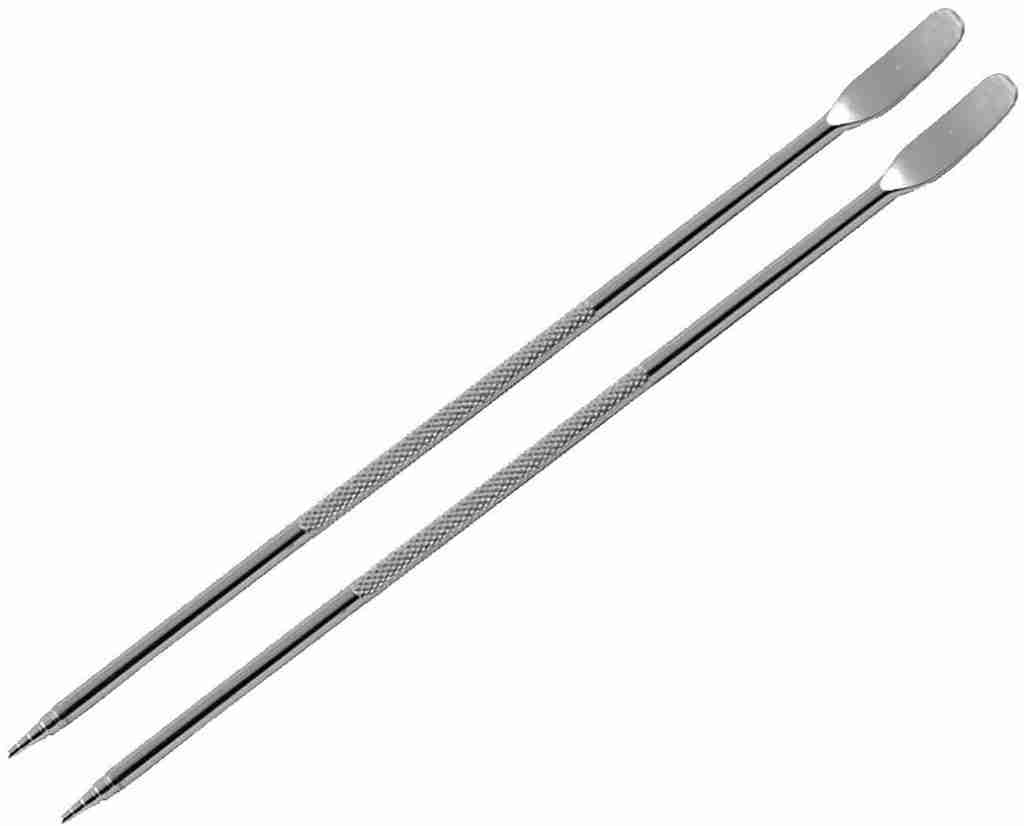
You could choose this one by Akoak’s, as it ticks all the boxes. However, if you’re going to purchase a different one, make sure it has a clear point on one side and a flat curve on the other. This way, you’re able to create two types of precise lines.
A coffee machine
Something else which is a bit more important is the coffee machine. Now, within the industry, you can get some excellent or awful coffee machines. Unfortunately, most of the time, this depends on the budget you have. However, here is one coffee machine that I can recommend to anybody.
Note – If you already have a coffee machine and you need a milk frother, you’re able to purchase frother machines. A good one that I can recommend is by Nespresso. It also comes equipped with a frother pitcher, so you won’t need to purchase one of these.
However, if you don’t have a coffee machine, I can recommend this “all-rounder” from Breville. This espresso machine from Breville, the Barista Max, is an astonishing machine. Including me, many others also think this machine is more than worth every piece of money you invest into it. With over 13,000 reviews on just Amazon, it goes to show how remarkable this coffee machine is.
Coffee capsules
Something that isn’t so important is coffee capsules. However, some better ones can offer more immense flavors. Although latte art is developed from milk as it sits on top of the espresso, you, your customers, or visitors will still drink it. Because of this, why not wow them with great art and even better flavor. Here are my three favorite coffee capsules:
- Nespresso Ispirazione Italiana Venezia
- Nespresso Fortissio Lungo
- Nespresso Ispirazione Ristretto Italiano Decaffeinato
The above are some of the best coffee capsules I truly believe exist on the market. However, these don’t necessarily determine how good your latte art will come out. Instead, it’ll just enhance its flavor.
It may be best to purchase cheaper capsules if you’re just starting out, as you may want to practice a few times. Because of this, some affordable alternatives to opt-in for are Peet’s Coffee capsules.
Milk
Now, for the most crucial ingredient, and that’s the milk. With milk, there isn’t a brand that I can highly recommend. However, you’ll want to choose milk that has a high-fat content, like whole milk. This way, the fattiness will sit on top of the espresso much better and give you bolder details within your art.
As you can see from the above, there isn’t much needed to start your latte art adventure. But, now that you understand what you need, you can then read the below steps to making latte art.
How to make latte art with steamed milk (4 simple steps)
Something that people don’t believe is that latte art isn’t that difficult. Yes, it takes sleight of hand, but after a few trial runs and the proper guidance, you should be able to get it in no time. To help better understand how to make latte art with steamed milk, I suggest you read the below steps.
Preparation
First and foremost, if you use a coffee machine with a wand, you must clean it after each use.If you are, be sure to pulse it on and off a few times before you steam your milk. This guarantees that your coffee machine’s duct is free from any particles. However, when you do this, be aware of the dangers that can occur when jet steaming your wand. It’s boiling, and even the hot vapor can cause severe burns.
Steaming
Now you’ve successfully prepared your wand, it’s time to start steaming the milk. You’ll want to begin by filling your pitcher with milk to just under the spout. Afterward, you can now submerge this in the wand and turn it on.
NOTE – Once submerged and on, if you hear some violent hiccupping, you’ve inserted the wand too far. You should only be able to hear some tiny hisses. To achieve this, don’t be afraid to tilt the pitcher slightly.
Once you’ve hit the “sweet spot,” you should look inside your picture to see if the milk is swirling evenly. While this is all going on, you’ll want to keep an eye on the temperature. Once your wand reaches around 140°F–180°F, it’s time to exsert it.
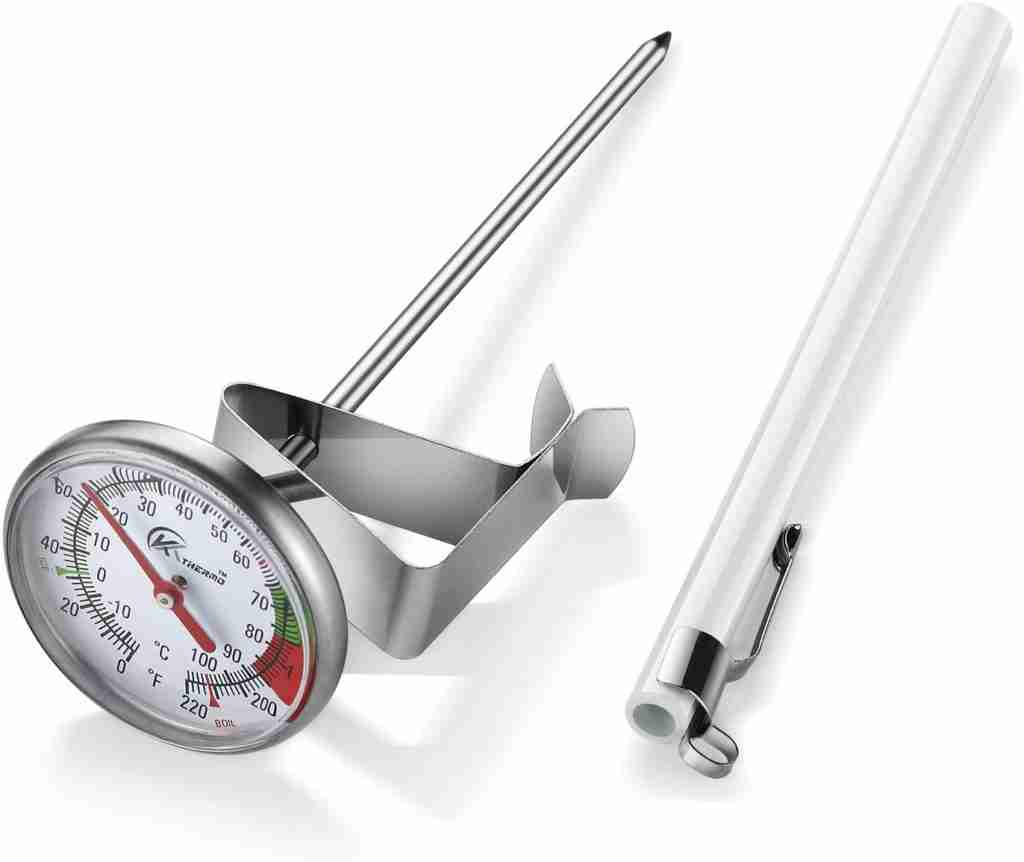
If your coffee machine doesn’t have a temperature indicator for the wand, I suggest you purchase an external one like this.
Now you have your foamed milk, you’ll want to give the pitcher a firm tap on the countertop. This will eliminate any large bubbles that have formed while steaming the milk.
Finally, once you have your steamed milk at pristine quality, it’s time to start pouring. To successfully achieve this, read the below.
Pouring
Before you master the design, you need to master the pour. The easiest way to execute each of these is with a rounded bowl-shaped cup (one of the cups mentioned above is ideal).
First, you’ll want to pour your espresso into the bottom of the bowl-shaped cup. After you’ll want to merge your steamed milk, you can do this by gently swirling it into the espresso.
The pace and the spacing between the cup and the pitcher are the most crucial factors for the perfect pouring method. For best results, pour slowly and take your time from a reasonably high distance. By doing this, it helps both the milk and espresso merge into each other. If you want to increase the amount of mixture between the milk and espresso, gently create a circular motion while pouring.
Design
Something a bit more challenging is transitioning from the pour to the design. It will take time and practice, but remember, Rome wasn’t built in a day, and the same goes for your latte art skills. However, to understand the technique more, I suggest you read below.
After pouring, you’ll want to bring your pitcher closer to the cup. This way, the milk won’t submerge into the espresso, and it’ll start to sit on top of it. Once you’ve reached the sweet spot of creating a clear distinction between the latte and the milk, you’re ready to start your design.
For best results, once you’ve started pouring this distinctive difference between both the latte and milk. You’ll want to start from the furthest side away from you and then draw the pitcher closer to your body in one swift motion.
This motion will create a circle, or otherwise known as the “base.” After you’ve achieved this, it’s time to start implementing your design. To find out more about these, I suggest you read the three simple latte designs for beginners below.

Threesimple latte art designs for beginners
Now you understand the whole concept of developing latte art, and it’s time to put your knowledge to the test and start producing some. Now, I’m sure you’ve seen an abundance of different art designs on popular social media platforms like Instagram and Pinterest. However, although they look nice, some are much harder than others for beginners.
As a result, I’ve selected three great beginner-friendly patterns for you to start your latte art journey. To find out more, read below.
Bear
If you seriously want to wow yourself or guests, then why not create a latte bear? Although that sounds quite questionable, it’s relatively easy to achieve.
First, you’ll want to implement the above tactics to pouring milk into your espresso. Once you’ve done this and found the sweet spot between the latte and dairy, it’s time to start creating the bear design.
Here you’ll want to start by creating two circles with the milk by pulling the pitcher towards you. Once you’ve built this “base,” you’ll want to add the ears of the bear. The most effective way to do this is by grabbing a teaspoon and applying the milk into the ear locations of the bear. Lastly, you’ll want to use your latte art tool to finalize the eyes, mouth, ears, and nose details.
Heart
The next beginner-friendly latte design is the heart. It isn’t just beginner-friendly, but also something that’ll look rather impressive to people who receive it. Again, like the above, you want to follow the steps of creating latte art and hit the perfect spot between the milk and latte. Once you get to this point, you’re ready to start developing a heart shape.
The heart shape is super easy. When you reach that perfect point, you’ll want to dash the pitcher either towards or away from you, depending on where you want to create the love heart. You’re developing the “M” and the long-pointed part of the heart from doing this. For a better understanding of how to achieve this, see the below video.
Rosetta
Another easy latte design is the rosetta, and this will truly make you look like a latte art expert. But, again, just like the others, you’ll want to start pouring from a high enough height so that the milk mixes with the espresso.
However, as you’re coming down, you’ll want to position the pitcher to the back of the cup and gently bring it closer to you while rocking it sideways. Once you reach a few millimeters away from the edge of the cup, drag your pitcher away from you to finish the rosetta pattern.
As you can see from the above, there are various “easy” patterns that you can start training with that look unique and wonderful. You can get more complex latte art than this. However, you first want to master these three, and then the others will be much easier.
Tips to remember when creating latte art
Latte art can be super easy or difficult for some depending on their traits. But, here are some tips for everyone to consider, no matter how good or bad you currently are at latte art. By remembering these, you’ll significantly improve your latte art expertise.
Provide yourself a clean canvas
When you start creating latte art, you also want to start with a blank canvas. Failing to do so may result in the espresso and milk not mixing correctly, which can cause havoc to your design.
When I say “blank canvas,” I’m suggesting you need a clean pitcher, cup, wand, and coffee beans or capsules. By providing yourself with this perfect “blank canvas,” then the outcome of your design will be much clearer and less contaminated from the attempts before.
Remember to pour into the center of the espresso
When you begin pouring the milk, you’ll want to focus on the center of the espresso. This is because you’re mixing the milk and espresso evenly before you raise the pitcher lower to get the milk to the surface.
As you pour into the middle of the espresso, as you come down to raise the milk, you’ll want to travel to the furthest point of the cup. By doing this, you’re given yourself maximum coverage for your latte art design.

Steam the right amount of milk
Something that many people misunderstand is steaming the right amount of milk. From doing this, you’re cutting your flow off too short or having too much leftover. If this does occur, it’ll quickly turn your pattern terrible and not suitable for serving.
In the perfect world, you’ll want your pitcher to run out of milk the second you finish your design. This way, you’ve completed your design, and it won’t cause as much mess.
Depending on your pitcher, you might create your own “perfect” indicator of how much milk you need. However, I usually go around a finger’s width apart from the beginning of the spout. By far, this seems like the sweet spot for me, considering the amount of espresso I put in it.
But, remember, everyone is different, so you’ll need to experiment and come up with your own rules for this one.
Understand what to pour ahead of time
Something that seems logical, but you should have a rough plan of what you’re going to pour before you generally do it. If you’re making these continuously throughout the day, you can lose concentration which could affect the results.
However, having a plan before you start will give you psychological muscle memory that’ll help you with smooth transitions during each step. It sounds way too complex for latte art, but it’s undoubtedly something that’ll help you out.
Picture a cross and centerline
If you’re struggling with making your designs either straight or in line with each other, there’s one thing you can teach yourself. Many latte art connoisseurs recommend that you look at a cup and mentally create an equal cross within it. From this, you’re able to work out the center, both horizontally and vertically.
It sounds somewhat questionable, but it most certainly works, and it’s something you should consider if you’re struggling with developing symmetrical designs.
Try not to wiggle too fast
After reviewing some helpful tips online, I found that many amateurs were wiggling their pitchers too fast. By doing this, you’re mixing the brown and white patterns. If this were to occur, you’d quickly see that both colors will start mixing, causing it not to look so pretty. To avoid this, consider pouring slower and widdling side to side much less.

Finish your design strong
After watching the above videos, you’ll quickly understand that to finish most designs, you need to strike the milk through the pattern. Although this looks easy, sometimes it’s much more complicated than it may seem.
It is the last and final step to finishing your design, so you don’t want to mess it up at this point. However, if you’re struggling with finishing well, you’ll want to pause at the end of the design, reposition yourself to make sure it’s symmetrical, and then continue with striking it through the heart.
Conclusion
As you can see from the above, there’s much more to latte art than what may meet the eye. However, depending on your traits and artistic mind, you may pick up this exciting hobby fast or very slow. Nonetheless, it’s a joyful activity that can have some great rewards when you finally master this strange form of art.
So, now you understand how to execute latte art, why are you waiting? Get preparing and start developing this unique skill, and begin wowing your guests, family, and friends.